Buick Regal: Automatic Transmission Flex Plate Replacement
Special Tools
- EN-45059 Angle Meter
- EN-50792 Holding Tool
Equivalent regional tools: Special Tools
Removal Procedure
1. Remove the transmission.
2.
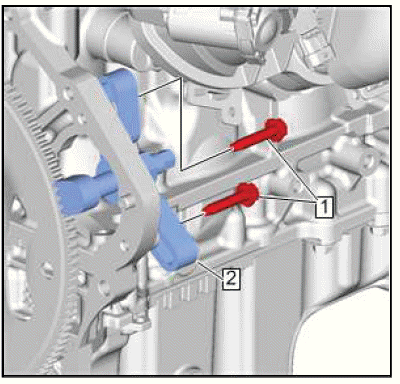
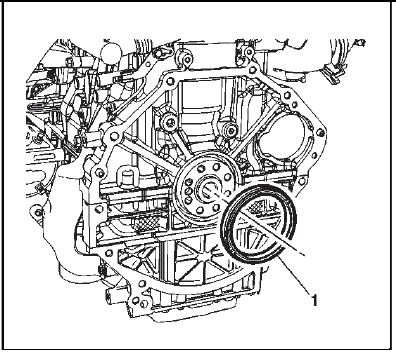
To prevent crankshaft rotation, install the EN-50792 holding tool (2) and starter motor bolts (1) at the starter motor location and engaging the automatic flex plate.
3.
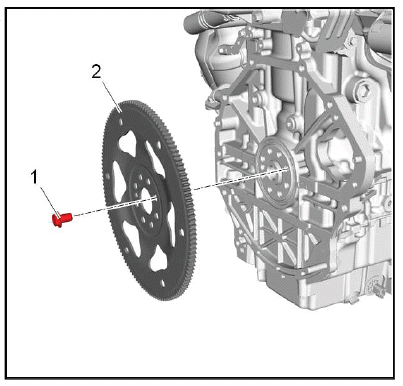
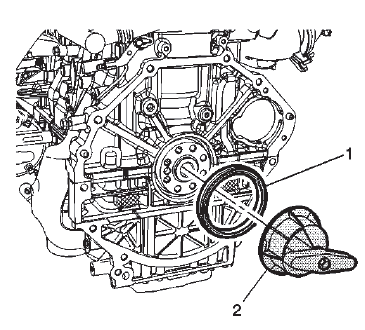
Automatic Transmission Flex Plate Bolt (1) - Remove and DISCARD [8x].
4. Automatic Transmission Flex Plate (2) - Remove.
5. Remove the special tool: EN-50792 holding tool.
Installation Procedure
1.
CAUTION: This vehicle is equipped with torque-to-yield or single use fasteners. Install a NEW torque-to-yield or single use fastener when installing this component.
Failure to replace the torque-to-yield or single use fastener could cause damage to the vehicle or component.
NOTE: Fasteners have adhesive patch and must be tightened to final torque within 5 minutes.
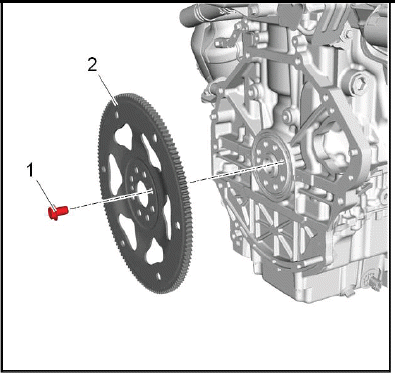
Automatic Transmission Flex Plate (2) - Install.
2. Automatic Transmission Flex Plate Bolt (1) - Install NEW [8x].
3.
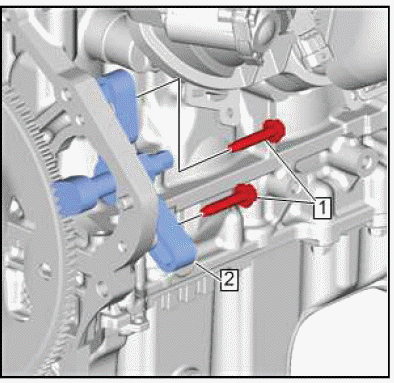
To prevent crankshaft rotation, install EN-50792 holding tool (2) and starter motor bolts (1) at the starter motor location and engaging the flex plate.
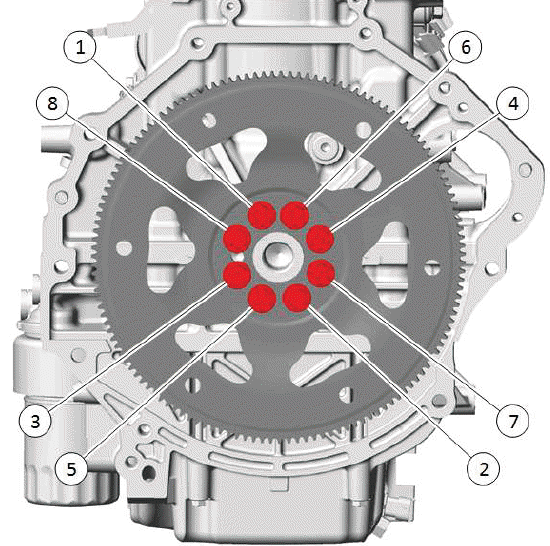
Fig. 10: Flywheel Flex Plate Bolts Tightening Sequence
4.
CAUTION: Fastener Caution.
Tighten in the sequence shown.
- First Pass: 30N.m (22 lb ft)
- Final Pass: 40 degrees - Use the special tool: EN 45059 meter
5. Remove the special tool: EN-50792 holding tool.
6. Transmission - Install.
CRANKSHAFT REAR OIL SEAL REPLACEMENT
Special Tools
EN-51380 Seal Installer
For equivalent regional tools, refer to Special Tools.
Removal Procedure
1. Remove the automatic transmission flex plate. Refer to Automatic Transmission Flex Plate Replacement.
2.
NOTE: Do not damage the outside diameter of the crankshaft or chamber with any tool.
Use a suitable tool to remove the crankshaft rear oil seal (1).
Installation Procedure
1. Using the (2) EN-51380 seal installer, install a NEW crankshaft real oil seal (1).
2. Install the automatic transmission flex plate. Refer to Automatic Transmission Flex Plate Replacement.
READ NEXT:
 Engine Replacement
Removal Procedure
1. Upper Intermediate Steering Shaft - Remove.
2. Recover the refrigerant. Refrigerant Recovery and Recharging (R-1234yf).
3. Drain the coolant. Cooling System Draining and Filling
Engine Oil and Oil Filter Replacement
Removal Procedure
1. Raise and support the vehicle.
2. Place a drain pan under the vehicle.
3.
Oil Pan Drain Plug (1) - Remove.
4. Oil Pan Drain Plug Seal (2) - Remove and DISCARD.
5. Drain the e
SEE MORE:
DTC B0017 or B0024
Diagnostic Instructions
Perform the Diagnostic System Check - Vehicle prior to using this
diagnostic procedure.
Review Strategy Based Diagnosis for an overview of the diagnostic
approach.
Diagnostic Procedure Instructions provides an overview of each
diagnostic category.
DTC Descriptors
D
DTC B0183
Diagnostic Instructions
Perform the Diagnostic System Check - Vehicle prior to using this
diagnostic procedure.
Review Strategy Based Diagnosis for an overview of the diagnostic
approach.
Diagnostic Procedure Instructions provides an overview of each
diagnostic category.
DTC Descriptors
D
