Buick Regal: Symptoms - Automatic Transmission
NOTE: Use the symptom tables only if the following conditions are met:
- Refer to Diagnostic Starting Point - Vehicle.
- There are no DTCs set.
- The control modules can communicate via the serial data link.
- Review the system operation in order to familiarize yourself with the system functions: Refer to Transmission General Description
Visual/Physical Inspection
Inspect the easily accessible or visible system components for obvious damage or conditions which could cause the symptom.
Intermittent
Faulty electrical connections or wiring may be the cause of intermittent conditions: Refer to Testing for Intermittent Conditions and Poor Connections.
Symptom List
Refer to a symptom diagnostic procedure from the following list in order to diagnose the symptom:
- Fluid Diagnosis
- Refer to Transmission Fluid Level and Condition Check
- Refer to Fluid Leak Diagnosis
- Noise and Vibration Diagnosis
- Refer to Noise and Vibration Analysis
- Refer to Torque Converter Diagnosis
- Shift Quality Feel Diagnosis
- Refer to Harsh Garage Shift
- Refer to Harsh Shifts
- Refer to Erratic Shift
- Refer to Slips in Drive or No Drive
- Shift Pattern
- Refer to No Upshift or Downshift
- Refer to No Manual Shift
- Torque Converter Diagnosis
- Refer to Torque Converter Diagnosis
- Symptom Not Found or No Symptom Detected
- Refer to Transmission Fluid Level and Condition Check
- Refer to Road Test
- Refer to Line Pressure Check
TRANSMISSION FLUID LEVEL AND CONDITION CHECK
Level Checking Procedure
1. Start the engine with the A/C turned off.
2. Move the shift lever to all positions from "P" to "D", waiting at least 2 seconds at each position. Repeat this again, and then return it to "P".
3. Raise and support the vehicle: Refer to Lifting and Jacking the Vehicle. The vehicle must be level, with the engine running and the shift lever in the PARK range.
NOTE:
- The vehicle must be level with the engine running and the shift lever in the PARK range.
- Use only recommended automatic transmission fluid: Refer to Adhesives, Fluids, Lubricants, and Sealers.
4. Wait until the automatic transmission fluid temperature reaches 35 - 45ºC (95 - 113ºF).
5.

NOTE: Some residual automatic transmission fluid will drain from the level setting hole when the plug is initially removed.
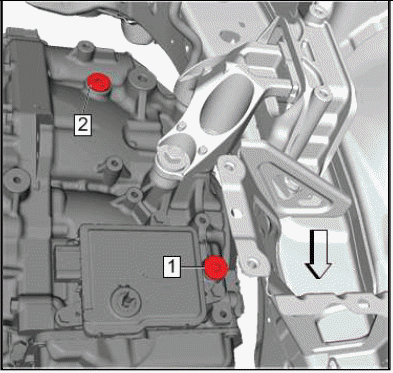
Remove the transmission oil drain plug (1). Allow any fluid to drain.
1. Wait until the fluid first begins to flow as a steady stream and is within the specified temperature range, install the transmission oil drain plug (1).
2.
NOTE: The fluid filler plugs installed at locations 1 & 2 at the vehicle assembly plant are one-time-use. They have an interference fit and do not have O-rings.
Once removed, these plugs must be replaced. The service part (replacement plug) available in the GM Parts Catalog (EPC) comes with an O-ring. Lubricate the seal with AW-1 fluid and install the O-ring prior to installing the plug. At each subsequent service, the service part plug (replacement plug) O-ring seal must be replaced. It is a one-time-use part. It is available separate from the plug in the EPC.
If no fluid comes out and the temperature is within the specified range, add fluid until fluid drips out as a steady stream, and then install the transmission oil drain plug (1). Use only the recommended automatic transmission fluid: Refer to Adhesives, Fluids, Lubricants, and Sealers.
CAUTION: Refer to Fastener Caution.
6. Using a NEW transmission oil drain plug seal (2), install and tighten the transmission oil drain plug (1) to 8 N.m (6 lb ft).
Condition of Automatic Transmission Fluid
NOTE:
- Insufficient automatic transmission fluid level will cause the oil pump to draw in air, causing the line pressure to decrease. This causes the clutch to slip, resulting in malfunctions such as a burned clutch.
- Excessive/over filled automatic transmission fluid level will cause the gears in the automatic transmission to agitate the automatic transmission fluid, causing bubbling and malfunctions such as deterioration. If the vehicle is driven under this condition, the automatic transmission fluid level can increase and the automatic transmission fluid may blow out of the transmission breather vent hose.
- If the automatic transmission fluid contains an excessive amount of metal or friction material, internal wear of the automatic transmission is suspected.
1. Check that the automatic transmission fluid is free of foreign matter.
NOTE: If the automatic transmission fluid is cloudy, water contamination is suspected. Inspect the cooling system.
2. Check that the automatic transmission fluid is not discolored.
READ NEXT:
 Line Pressure Check
Special Tools
EN-21867 Pressure Gauge
EN-21867-50 Transmission Line Pressure Adapter
For equivalent regional tools, refer to Special Tools.
Line Pressure
1. Apply the parking brake and chock the
Fluid Leak Diagnosis
General Method
1. Verify that the leak is transmission fluid.
2. Thoroughly clean the suspected leak area.
3. Operate the vehicle for 24 km (15 mi), or until normal operating temperatures
are reach
Harsh Garage Shift
"N" to "D"
ATF Level/Condition
TCM
Shift Cable Adjustment
Valve Body
"N" to "R"
ATF Level/Condition
TCM
Shift Cable Adjustment
Valve Body
ERRATIC SHIFT
Erratic Shifting
Output Speed Sens
SEE MORE:
Global Positioning
System (GPS)
Obstruction of the GPS can
occur in a large city with tall
buildings; in parking garages;
around airports; in tunnels and
underpasses; or in an area with
very dense trees. If GPS signals
are not available, the OnStar
system should still operate to
call OnStar. However, OnStar
could have d
Air Conditioning Evaporator Replacement
Removal Procedure
1. Air Conditioning Evaporator and Blower Case Replacement - Remove.
2.
Heater and Air Conditioning Evaporator and Blower Upper Case Bolt(1) -
Remove[11x].
3. Heater and Air Conditioning Evaporator and Blower Upper Case(2) - Remove.
4. Unlock the retaining tabs.
5.
Air Condi
