Buick Regal: Range Selector Lever Cable Replacement
Removal Procedure
1. Battery Tray - Remove - Refer to Battery Tray Replacement.
2.
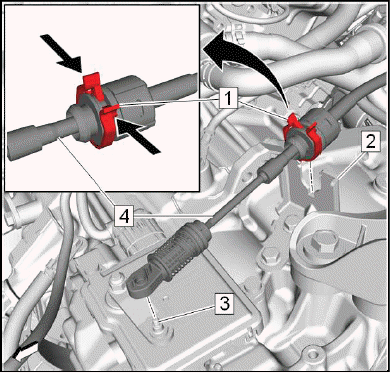
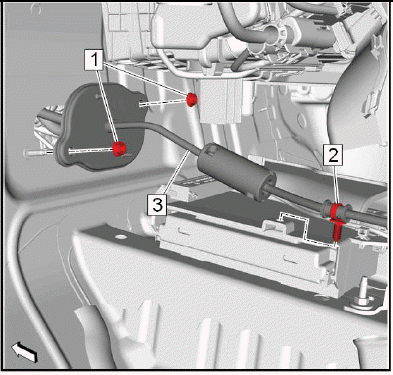
Range Selector Lever Cable (4) @Range Selector Lever Cable Lever (3) - Remove.
3. Range Selector Lever Cable@Transmission Range Selector Lever Cable Bracket (2) - Remove.
- Push (arrows) the 2 latches of the retainer (1) to release the range selector lever cable from the bracket.
4. Transmission Control Lever Knob - Remove - Refer to Transmission Control Lever Knob Replacement.
5. Front Floor Console - Remove - Refer to Front Floor Console Replacement.
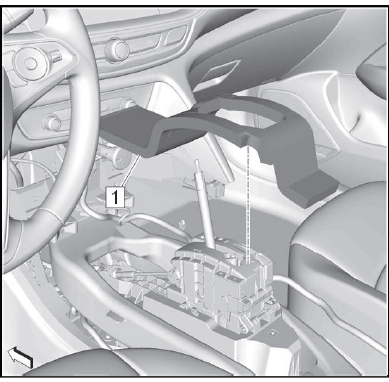
6.
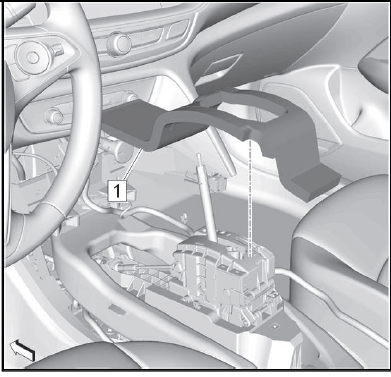
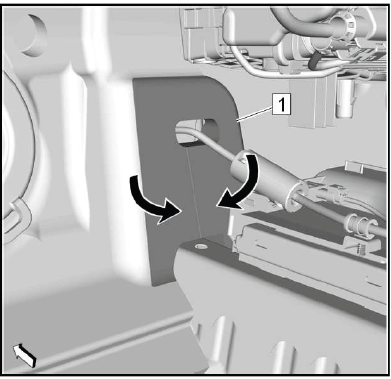
Transmission Control Lever Insulator (1) - Remove.
7. Front Floor Console Rear Air Front Duct - Remove - Refer to Front Floor Console Rear Air Duct Replacement (Front) Refer to Front Floor Console Rear Air Duct Replacement (Rear).
8.
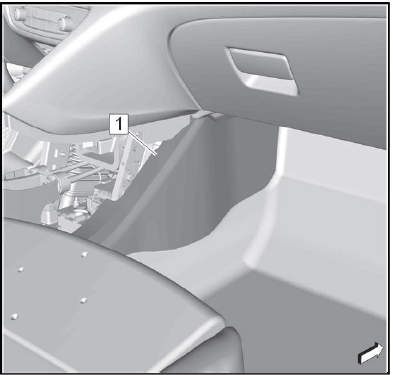
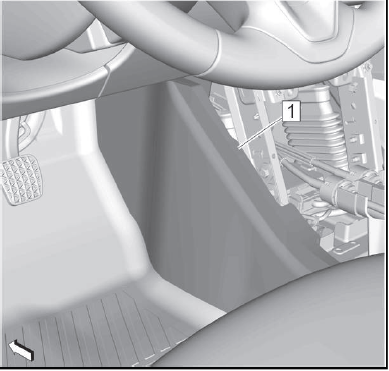
Front Floor Panel Carpet-Right Side (1) - Position aside.
9.
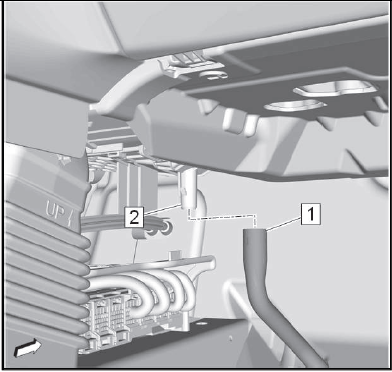
Air Conditioning Evaporator and Blower Module Drain Hose (1) @Air Conditioning Evaporator and Blower Case (2) - Disconnect.
10. Air Conditioning Evaporator and Blower Module Drain Hose - Position aside.
11. Accelerator Pedal Position Sensor - Remove - Refer to Accelerator Pedal with Position Sensor Assembly Replacement.
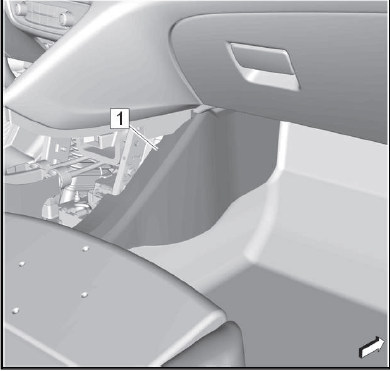
12.
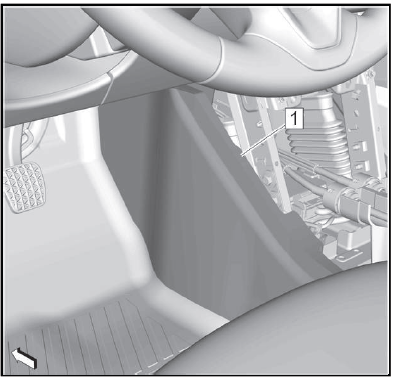
Front Floor Panel Carpet-Left Side (1) - Position aside.
13.
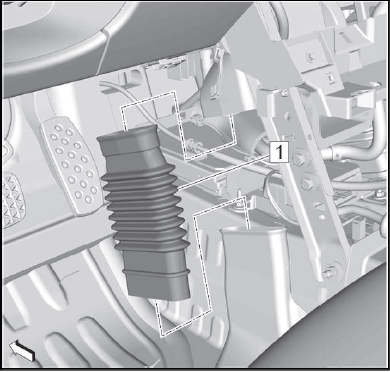
Floor Rear Air Outlet Duct Adapter-Left Side (1) - Remove.
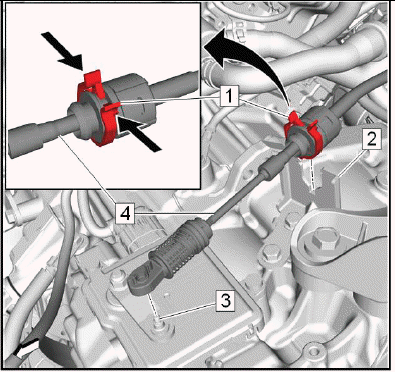
14.

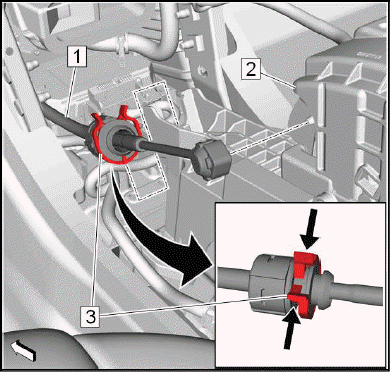
Range Selector Lever Cable (1) @Transmission Control (2) - Remove.
- Remove the range selector lever cable with a suitable tool from the ball joint of the transmission control.
- Push (arrows) the 2 latches of the retainer (3) to release the range selector lever cable from the front of the transmission control.
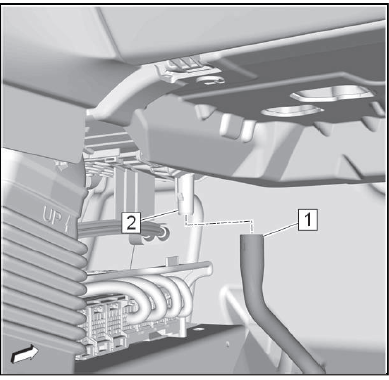
15.
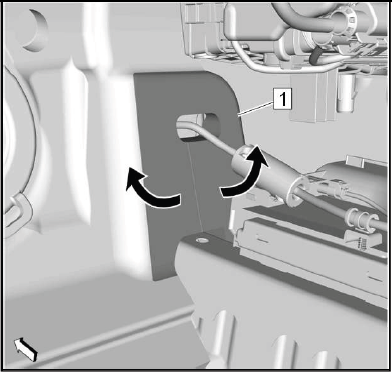
Dash Panel Inner Insulator (1) - Position aside.
- Flap (arrows) the dash panel inner insulator aside, to gain access to the transmission range selector lever cable grommet nuts.
16.
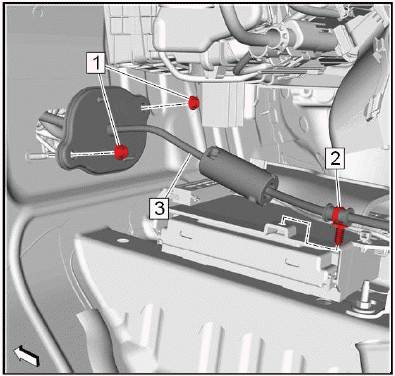
Range Selector Lever Cable Retainer (2) @Body Control Module Bracket - Unclip.
17. Transmission Range Selector Lever Cable Grommet Nut (1) - Remove[2x].
18. Range Selector Lever Cable (3) @Vehicle - Remove.
Installation Procedure
1.
Range Selector Lever Cable (3) @Vehicle - Install.
2. Transmission Range Selector Lever Cable Grommet Nut (1) - Install and tighten[2x]6.5N.m (58 lb in).
3. Range Selector Lever Cable Retainer (2) @Body Control Module Bracket - Install.
4.
Dash Panel Inner Insulator (1) - Reposition.
5.
Range Selector Lever Cable (1) @Transmission Control (2) - Install.
- Push the range selector lever cable to the front of the transmission control. The retainer (3) must engage noticeable.
- Install the range selector lever cable to the ball joint of the transmission control.
6.

Floor Rear Air Outlet Duct Adapter-Left Side (1) - Install.
7.
Front Floor Panel Carpet-Left Side (1) - Reposition.
8. Accelerator Pedal Position Sensor - Install - Refer to Accelerator Pedal with Position Sensor Assembly Replacement.
9.
Air Conditioning Evaporator and Blower Module Drain Hose (1) @Air Conditioning Evaporator and Blower Case (2) - Connect.
10.
Front Floor Panel Carpet-Right Side (1) - Reposition.
11. Front Floor Console Rear Air Front Duct - Install - Refer to Front Floor Console Rear Air Duct Replacement (Front) Refer to Front Floor Console Rear Air Duct Replacement (Rear).
12.
Transmission Control Lever Insulator (1) - Install.
13. Front Floor Console - Install - Refer to Front Floor Console Replacement.
14. Transmission Control Lever Knob - Install - Refer to Transmission Control Lever Knob Replacement.
15.
Range Selector Lever Cable (4) @Transmission Range Selector Lever Cable Bracket (2) - Install.
- Push the range selector lever cable into the bracket. The retainer (1) must engage noticeable.
16. Range Selector Lever Cable@Range Selector Lever Cable Lever (3) - Install.
17. Range Selector Lever Cable - Adjust - Refer to Range Selector Lever Cable Adjustment.
18. Battery Tray - Install - Refer to Battery Tray Replacement.
READ NEXT:
 Range Selector Lever Cable Adjustment
Removal Procedure
1. Battery Tray - Remove - Refer to Battery Tray Replacement.
Adjustment Procedure
1.
Push the secure ring (1) against the spring force forwards.
2. Lift the range selector lever c
Transmission Control Lever Knob Replacement
Removal Procedure
1. Set the parking brake.
2. Shift the transmission control lever into Reverse position.
3.
Gently release the transmission control lever boot bezel (1) at the front.
Unclip 6 re
Vent Hose Replacement
Removal Procedure
1. Raise and support the vehicle. Lifting and Jacking the Vehicle.
2.
Transmission Vent Hose (1) @Transmission - Disconnect.
3. Lower the vehicle.
4.
Unclip the vent hose retain
SEE MORE:
DTC B255D
Diagnostic Instructions
Perform the Diagnostic System Check - Vehicle prior to using this
diagnostic procedure.
Review Strategy Based Diagnosis for an overview of the diagnostic
approach.
Diagnostic Procedure Instructions provides an overview of each
diagnostic category.
DTC Descriptor
DT
DTC P0815, P0816, or P0826
Diagnostic Instructions
Perform the Diagnostic System Check prior to using this diagnostic
procedure: Refer to Diagnostic System
Check - Vehicle
Review the description of Strategy Based Diagnosis: Refer to Strategy
Based Diagnosis
An overview of each diagnostic category can be found here: R
